However, the good thing is that Microsoft’s Windows 11 provides you with different options to troubleshoot various problems. On Techviral, we have already shared quite a few guides on troubleshooting various problems on Windows 11. Today, we will share a step-by-step guide on how to access the Advanced Startup options on Windows 11. But before that, let’s check out what the Advanced Startup option is?
What are Advanced Startup Options?
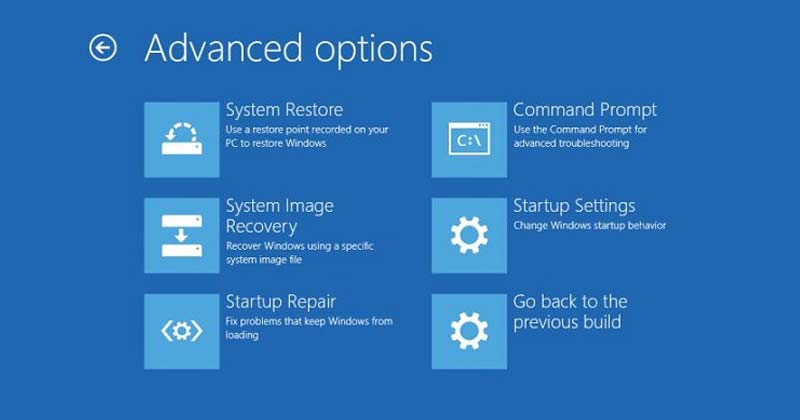
Advanced Startup options is basically a recovery environment that allows you to find and fix various problems. You can access the Advanced Startup options on Windows 11 to troubleshoot, diagnose, and fix most problems when the OS is not working correctly.
With Advanced Startup options, you will find access to various Windows diagnostic and repair tools such as Reset this PC, Command Prompt, Startup Repair, System Restore, and many others.
Ways to Access Advanced Startup Options on Windows 11
It’s pretty easy to access the advanced startup options in Windows 11, and there are multiple ways to access them. Here are some of the best ways to access Advanced Startup options on Windows 11.
1) Access Advanced Startup on Windows 11 via Settings
We will utilize Windows 11’s Settings app to access the Advanced Startup options in this method. Here’s what you need to do.
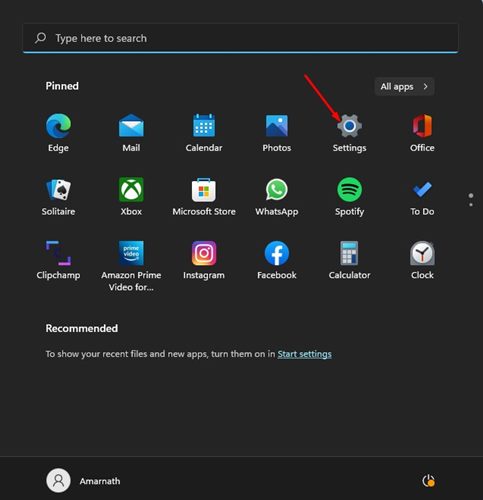
First of all, click on the Windows 11 Start button and select Settings.
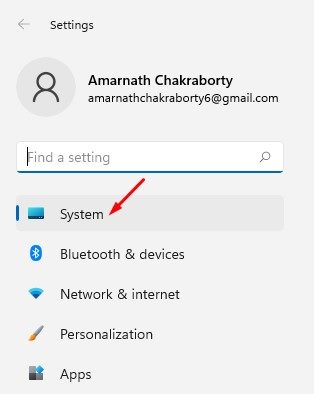
On the Settings app, click on the System option as shown below.
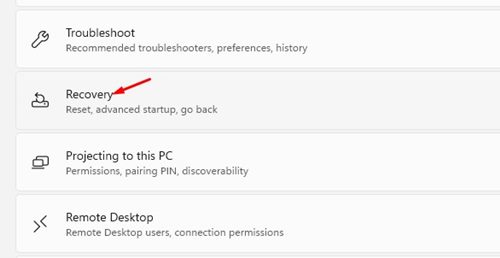
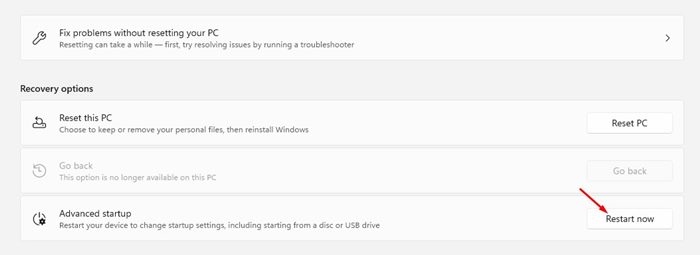
On the right pane, find the Recovery options.
Now click on the Restart now button beside Advanced Startup.
That’s it! You are done. This will restart your Windows 11 computer, and you will see the option to access the Advanced Startup options.
2) Access Advanced Startup using Quick Link
In this method, we will access the Advanced Startup option on Windows 11 via Quick Link. Here’s what you need to do.
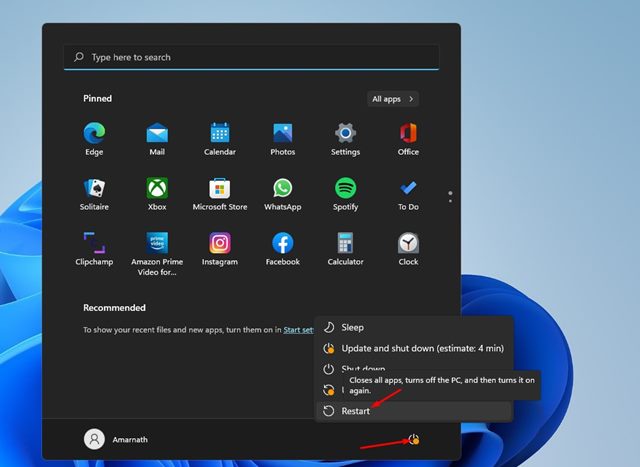
First of all, click on the Windows 11 Start button and then on the Power button. Now press and hold the Shift key and select the Restart option.
That’s it! You are done. This will restart your Windows 11 PC and take you to the Advanced Startup options.
3) Access Advanced Startup Options via Command Prompt
In this method, we will utilize the Command Prompt to access the Advanced Startup options. Here are some of the simple steps you need to follow.
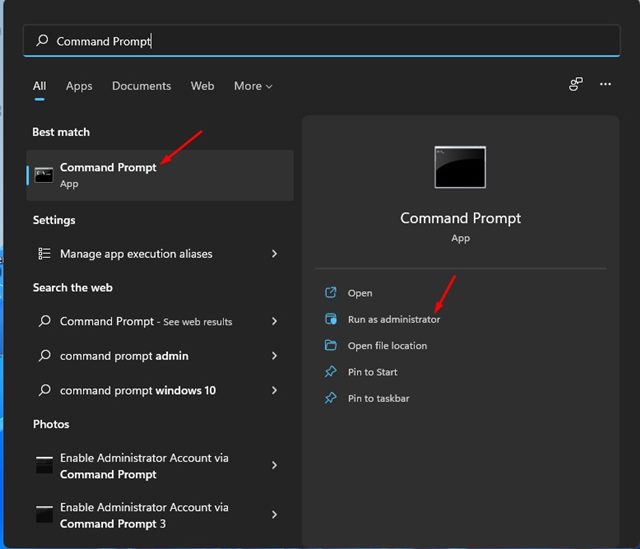
First of all, click on the Windows 11 search and type in CMD. Now right-click on the Command Prompt and select Run as administrator.
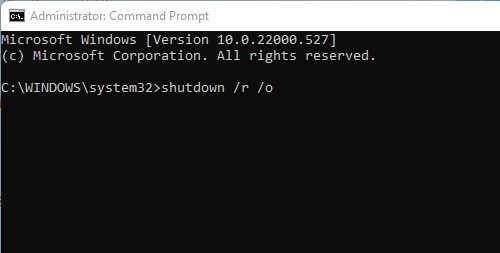
On the Command Prompt window, execute the command: shutdown /r /o
Now, you will see a signoff message asking you to save your work. That’s it! You are done. Now your PC will restart and will automatically open the Advanced Startup options menu,
4) Access Advanced Startup on Windows 11 via Installation Media
If you already have a Windows 11 bootable USB device ready, you can use it to access the Advanced Startup on Windows 11. Here are some of the simple steps you need to follow.
- First of all, insert a flash drive or USB drive on your Windows 11 computer.
- Now restart your PC and boot from the USB device.
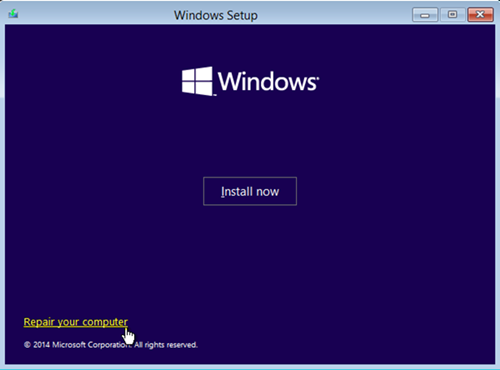
- On the Windows Setup screen, click on the Repair your computer option.
That’s it! You are done. This will start the Advanced Startup options on your Windows 11 computer.
5) Access Advanced Startup using Automatic Repair
Another best way to access the advanced startup options is to trigger an Automatic repair. It’s the least recommended method, but it works. However, you need to make multiple attempts to make this method work.
- First, restart your PC by pressing the physical power button. When your PC is booting, you need to press the physical power button again to force a restart. The goal of this is to interrupt the boot process.
- You need to repeat the process 3-4 times until you see the ‘Automatic Repair’ screen. On the Automatic Repair screen, click on Advanced Startup Options. That’s it! You are done. This is how you can access Advanced Startup options on WIndows 11 via Automatic repair. These are the best methods to access the Advanced Startup options on Windows 11. After entering the advanced startup options, you can troubleshoot various system errors. I hope this article helped you! Please share it with your friends also. If you have any doubts related to this, let us know in the comment box below.
