Windows 11 introduced many changes along with the visual features. However, after using Windows 11 for a while, I have noticed that Microsoft had made it difficult for a user to change the default apps. Changing default apps on Windows 10 was pretty straightforward. However, Windows 11 requires a few more clicks to do it. So, if you cannot change the default apps on Windows 11, you are reading the right article. Also read: How to Install Windows 11 From USB
Steps to Change Default Apps on Windows 11
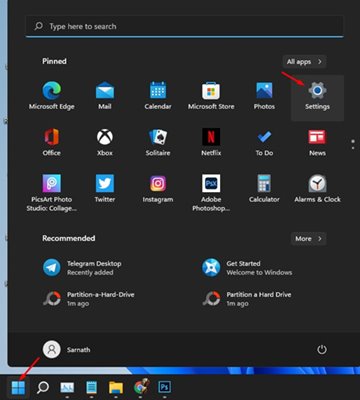
In this article, we will share a step-by-step guide on how to change the default apps on Windows 11. The process is going to be very easy. Just implement some of the simple steps given below. Step 1. First of all, click on the Start menu and select Settings.
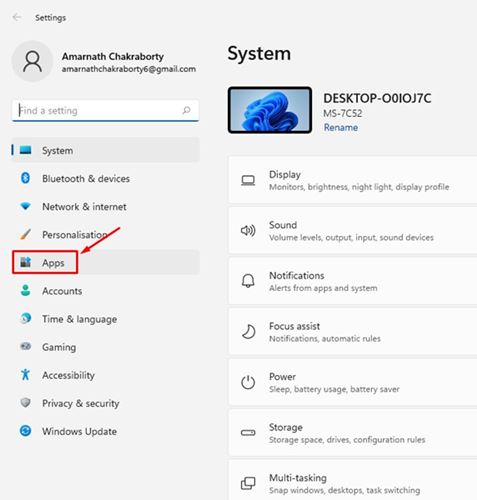
Step 2. Click on the ‘Apps‘ option on the Settings app, as shown in the screenshot below.
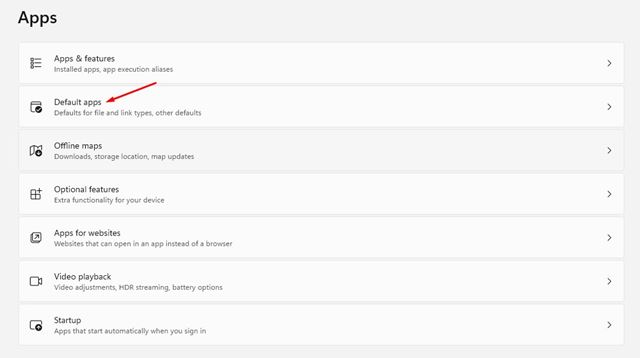
Step 3. On the next window, click on the ‘Default apps’ option.
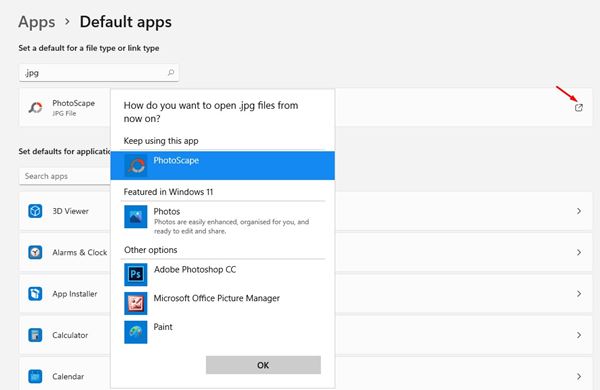
Step 4. Under the apps, you need to set defaults for file types. For example, I want to set defaults for the .jpg file. So, here I need to enter the .jpg and hit the Enter button.
Step 5. Windows 11 will show you the default application for JPG files. You need to click on the app name and select the application of your choice.
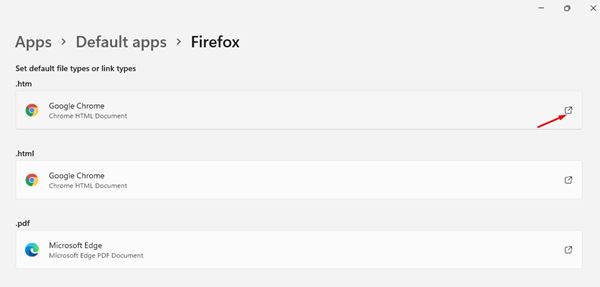
Step 6. Similarly, you can set defaults for applications also. For example, if you want .htm or .html files to always open on the Firefox browser, click on the Firefox app.
Step 6. On the next page, you need to set the default application for .htm and .html file types. Click on the file type and pick your desired web browser.
The process is quite tedious, but it gets things done. You can change the defaults for every file type and application. That’s it! You are done. This is how you can change the default apps on Windows 11. So, this guide is all about how to change the default apps on Windows 11. I hope this article helped you! Please share it with your friends also. If you have any doubts related to this, let us know in the comment box below.
