So better is to customize the stock Rom according to your wish, and yes, you can do this after rooting your android device. And this all possible with a cool android tweaker and its module to customize anything you want in your android. So have a look at the complete method discussed below to proceed. Also Read: How To Bring Apple’s ‘Live Photos’ Feature To Your Android Device
Steps To Customize Stock Rom In Rooted Android
The method is quite simple and needs a rooted android device that will allow the Xposed installer to run on the device. And after having the Xposed installer, you will be using an Xposed module app to Customize Stock Rom on your device. For this, follow the guide below.
Features Of Wanam Xposed Module:
Call Recording Auto call recording (GalaxyS5 and newer) 4 Ways Reboot (Reboot, Recovery, Hotbot, Download) Full Color/Transparency customization for Status bar and Notification drawer elements Secure Samsung Keyboard Option to keep “Add Call” button with Call recording menu Disable Camera shutter sound (+Screen Capture) Flashlight trough volume button UP Skip Music with Volume buttons Save Call Logs View Enable Keyboard Symbols Enable Hangouts Calls through cellular Enable Camera while calling Unlimited and Customizable Multi-View support Bypass Exchange Lock check Notification Panel Customization Long Home key behavior Long Back key to kill App (+ white list) Disable increasing ringtone Messaging Tweaks (raise limits and conversion) Disable Scrolling cache Enable Full rotations White/Colored Circle Battery Transparent Notifications panel Customize Clock format and size Customize Battery text helper size Customize Quick Settings buttons number per row Collapse Quick Settings after toggle 2 line formatted date on the panel header Dark themed Multi-Window Disable Boot sound Customize Two-line date header format White/Black Email App background (Supported on some devices) Transparent Quick Settings buttons background Default hidden SMS logs Add Call button to Logs and Contacts list Disable Accounts icons on the Contacts list Customize Wifi AP Clients number Disable Launcher page rotation Add Exit button to the browser SMS Automatic input mode Disable Call number formatting Enable unlimited Contacts joining Enable Gallery Rotation trough button Set default Browser view to Desktop Hide Wireless charging popup Hide Full Battery Notification Clock position Status bar (Hide, Left, Right, Center) NFC behaviors (UN/Locked on Screen ON/Off) Hide Headset icon and notification bar Disable TW DVFS Blacklist for Application where you want to disable DVFS when it’s default enabled Hide Smart Stay, Alarm, NFC icons on the status bar Launcher: Enable Scroll wallpaper and Hide Dock labels Disable Wake Home button Use separate Address field on Contacts Add Fast PIN unlock (to be used with caution) Added SMS sent time details Enable Screen ON options on Messaging App Disable low Battery warning Add custom carrier label on notification label Set low Camera battery level Change System Holo Dark/Light background Access hidden Lockscreen shortcuts menu Disable SEAndroid/Knox notifications and container Disable volume control sound Disable low battery sound Auto Disable Knox notifications when Knox Apps are installed Set SELinux to Permissive mode on boot ScreenShot and ScreenRecord (Requires Busybox) on Power menu (KitKat FWs only) CM Numeric Circle battery (KitKat Roms only) Screen Off animation (CRT/Fade) (KitKat Roms only) Expand all notifications Disable Temperature check on Camera recording and Flash Enable Heads up notifications for Kitkat Builds (Optional ongoing notifications and display delay customization) Support health and Private mode (Disable secure storage on both Apps) Disable Battery and USB cover warning & much more to come
Steps To Customize Stock Rom In your Rooted Android:
- First of all, you need a rooted android as the Xposed installer can only be installed on a rooted android, so Root your android to proceed.
- After rooting your android device, you have to install the Xposed installer on your android, and that’s quite a lengthy process; and for that, you can proceed with our Guide to Install Xposed Installer On Android.
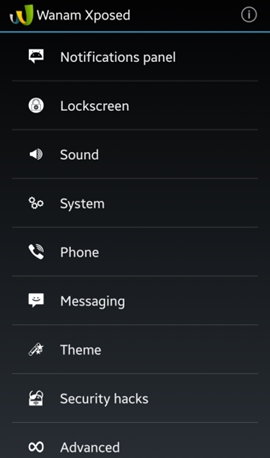
- Now, after installing the Xposed module, you need a cool Xposed module that will allow you to customize your device completely, and the module you will be downloading is Wanam Xposed. 4. Now install the app and then in Xposed module this app and after that, you need to reboot your android device for the proper working of the module in your device. 5. Now launch the app, and you will see lots of customization options and start customization and edit all of them according to your wish. Use the complete guide discussed above and fully customize everything in your stock ROM. Share the post with others too. Leave a comment below if you have any related queries with this.
