The built-in antivirus program of Windows 11 is of great use; it protects your PC from various types of security threats like malware, viruses, PUPs, and more. However, the problem is that Microsoft Defender consumes lots of system resources. Also, if you are using a third-party Antivirus program, it’s best to disable the Microsoft Defender or Windows Security application. The Windows security app automatically disables itself whenever it detects any additional security program. Also Read: How To Disable Windows Defender (3 Methods)
Steps to Disable Microsoft Defender in Windows 11
However, if it’s not disabled, you can disable it from the Windows Security settings. So, in this article, we will share a step-by-step guide on how to disable the Windows 11 security service temporarily. Let’s check out.
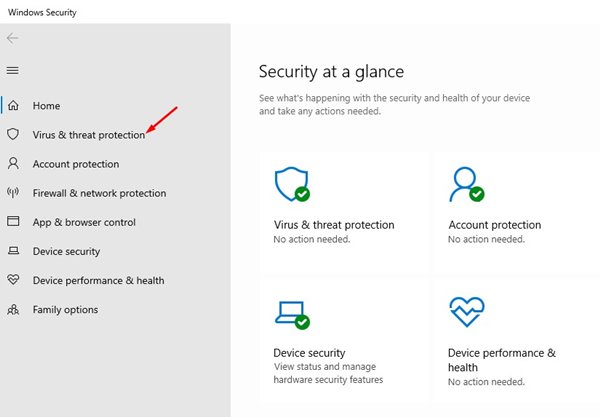
First of all, click on the Windows search and type in Windows security. Then, open the Windows security app from the list.
On the Windows Security app, click on the Virus & threat protection section.
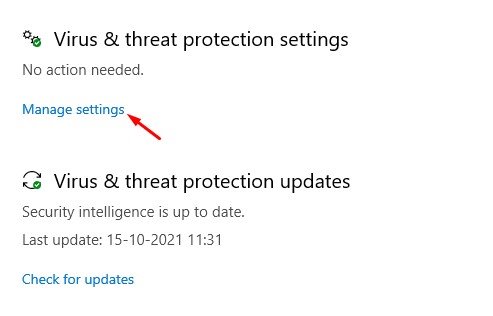
Next, on the right pane, click on the Manage Settings under the Virus & threat protection settings.
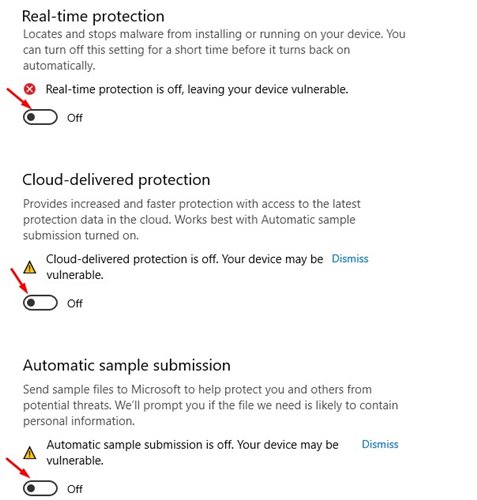
Disable the Real-time protection, Cloud-delivered protection, and Tamper Protection feature on the next Window on the right pane.
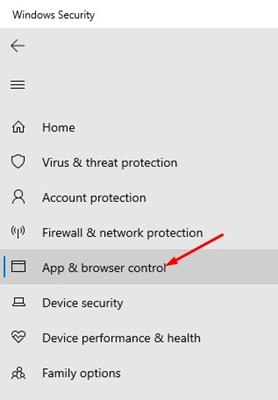
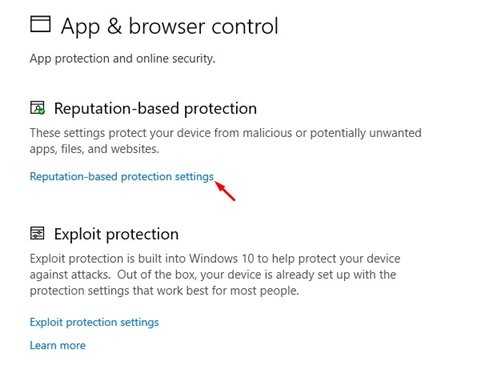
Next, select the App & Browser control option on the left pane.
On the Right pane, click on the Reputation-based protection settings.
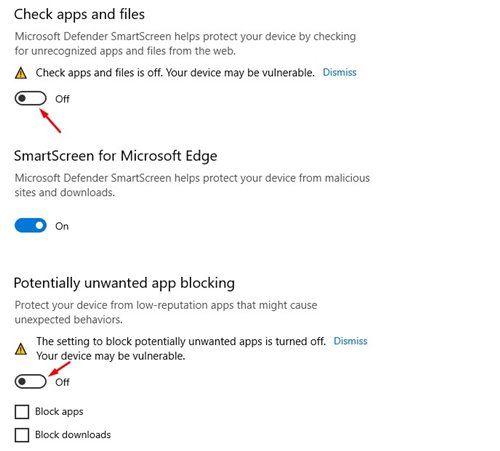
Disable the Check apps and files and Potentially unwanted app blocking option on the right pane.
Important: Only disable these features if you have other reliable security applications installed on your system. Windows Security is an important security app that should be left enabled. So, this guide is all about how to disable Windows Security in Windows 11. I hope this article helped you! Please share it with your friends also. If you have any doubts related to this, let us know in the comment box below.
