The new start menu is still a big deal for regular Windows users, especially when they upgrade from Windows 7. If we talk about the Start Menu features, it’s one of the useful features of Windows, which opens a menu of all installed apps. Through the Start menu, you can also access the system settings. Not many would know, but Microsoft has also introduced a full-screen mode for the Start Menu. Although you can use the Windows 10 tablet mode to access the full-screen start menu, we are talking about something different. [alert-announce]Also Read: Best Free Icon Packs For Windows 10[/alert-announce]
Steps to Enable or Disable Windows 10’s Full-Screen Start Menu
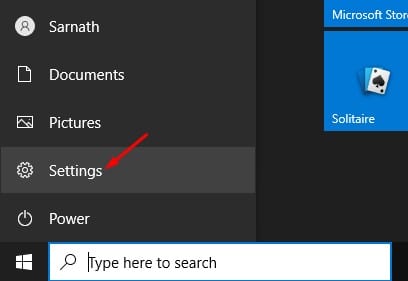
In the desktop mode, Windows 10 allows you to use the Start Menu in a full-screen mode in a more traditional way. The desktop mode full-screen Start menu only covers the entire screen, but not the taskbar. So, in this article, we are going to share a method to enable/disable Windows 10’s full-screen start menu. Let’s check out. Step 1. First of all, click on the Start button on your Windows 10.
Step 2. Now you need to click on the ‘Settings’ icon.
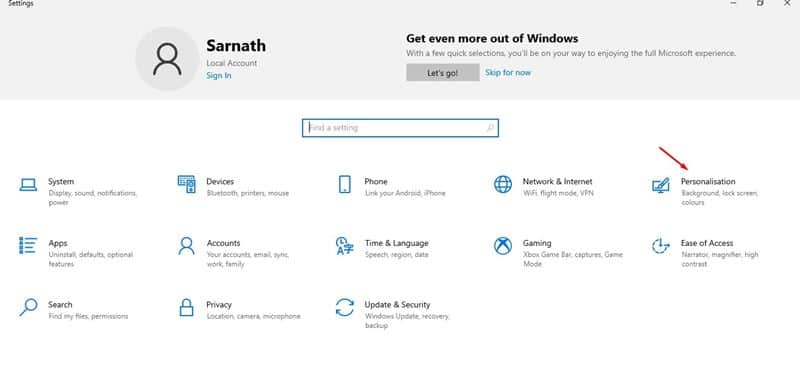
Step 3. This will open the Settings page. Click on the ‘Personalization’ option.
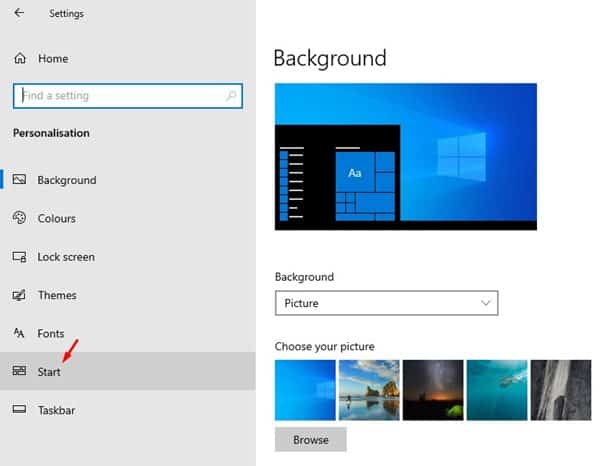
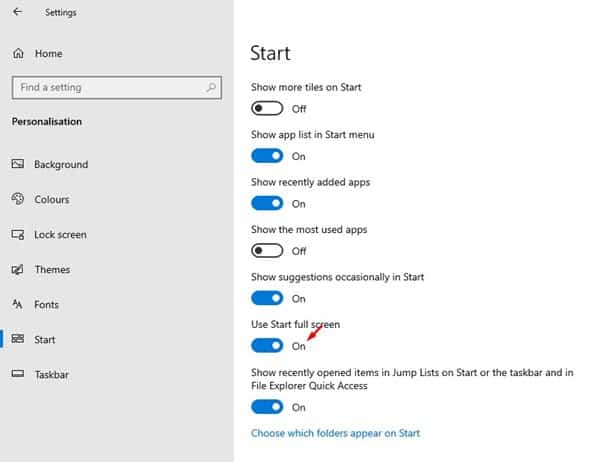
Step 4. Now from the left-hand side panel, click on the ‘Start’ option.
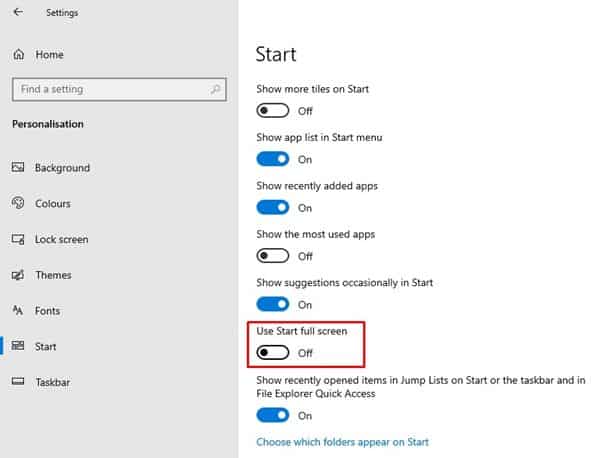
Step 5. Under the start, scroll down and find the option ‘Use Start Full Screen’
Step 6. To enable the Start full screen, just use the toggle button to enable the full-screen start menu.
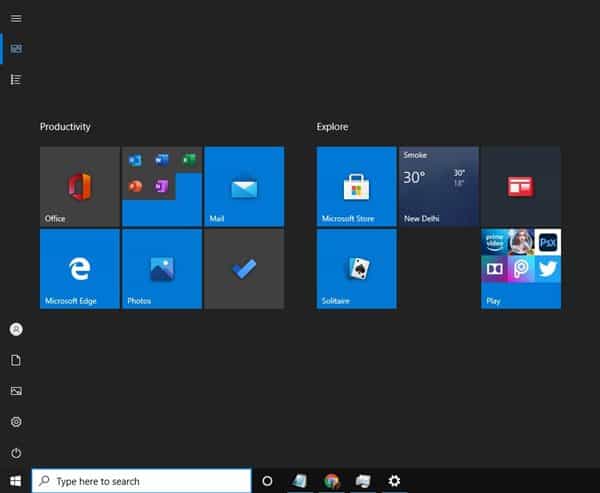
Step 7. Now click on the Start button, and you will see a full-screen Start Menu.
That’s it! You are done. This is how you can enable Windows 10 full-screen start menu. To disable the Full-screen mode, just disable the option that you have enabled in Step 6. So, this article is all about how to enable or disable a full-screen start menu. I hope this article helped you! Please share it with your friends also. If you have any doubts related to this, let us know in the comment box below.

