Steps To Enable “Tab Groups” Feature In Google Chrome Browser
While talking about web browsers, one can’t simply ignore Google Chrome. Google Chrome is right now the most used web browser which is available for Windows, Android, iOS, and Linux. The best thing about the Chrome browser is that it’s backed by the search giant Google. Compared to all other web browsers, Google Chrome provides users more features and customization options. Not only that, but Google Chrome also got extension support as well. So, with extensions, you can expand the functionality of the Chrome browser. Let’s admit, we all have the habit of shuffling through hundreds of tabs. Since we now use Google Chrome more than often, it’s essential to organize the web browser in a better way. To manage the Chrome tabs, there are plenty of Tab manager extensions available on the Chrome web store. These extensions can help you to organize your digital life in a better way. However, the use of extensions can lead to higher RAM and Disk usage, which can slow down your entire system. So, to deal with such a situation, Google Chrome just introduced a Chrome tab manager feature.
What is Chrome ‘Tab Groups’?
Well, Tab Groups is a new feature that allows users to organize tabs into visually distinct groups. The new feature separates the tabs associated with different tasks. To use the new feature, users should download the Chrome Canary browser. For those who don’t know, Chrome canary is a web browser for those who want to try out the bleeding edge features coming to the regular chrome web browser. That means you can expect a few bugs on the browser, but you can enjoy the latest features.
How To Enable The Tab Groups In Google Chrome?
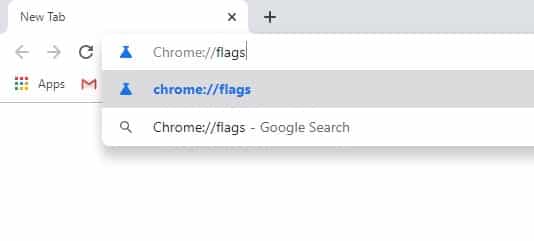
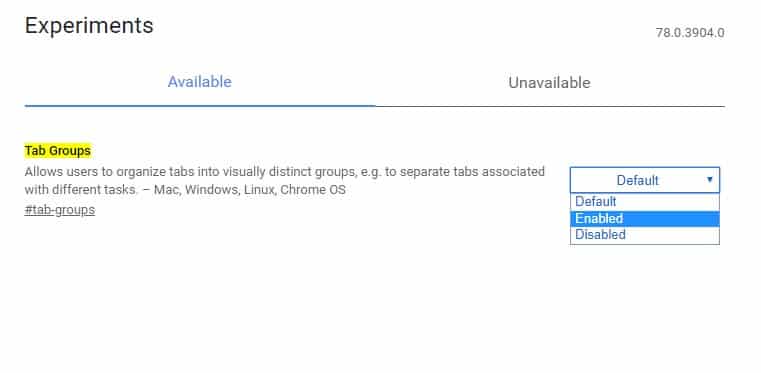
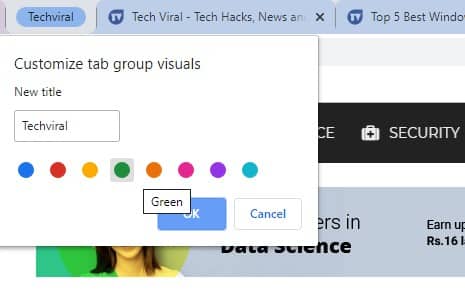
The tab group feature for Chrome is under development, but it can be turned on by enabling the Chrome flag. We recommend you to try the new feature on Chrome Canary because it doesn’t work fine on Chrome web browser. To enable Tabs groups, follow some of the simple steps given below. First of all, open Chrome Canary web browser and then enter Chrome://flags in the URL bar. Now on the Flags page, search for ‘Tab Groups’. Enable the option from the drop-down list and click on ‘Relaunch Now’ Once done, you just need to visit the sites as you usually do. The Canary web browser will automatically assign the sites into tab groups. You can also assign different colors for different tab groups. That’s it, you are done! This is how you can enable the ‘Tab Groups’ feature on Chrome browser. If you have any other doubts, let us know in the comment box below.


