With Vertical tabs, the new Microsoft Edge browser easily outperforms Google Chrome on the usability front. Vertical tabs do not just look good; it significantly improves work efficiency. Also, the feature makes it easier to manage a large number of tabs simultaneously. We have already shared a detailed guide on enabling Vertical tabs on the Microsoft Edge browser. If you use Microsoft Edge, we recommend you to check out that article. Since Vertical tabs are not available in Google Chrome, users need to rely on third-party extensions to bring the functionality.
Steps to Enable Vertical Tabs in Google Chrome Browser
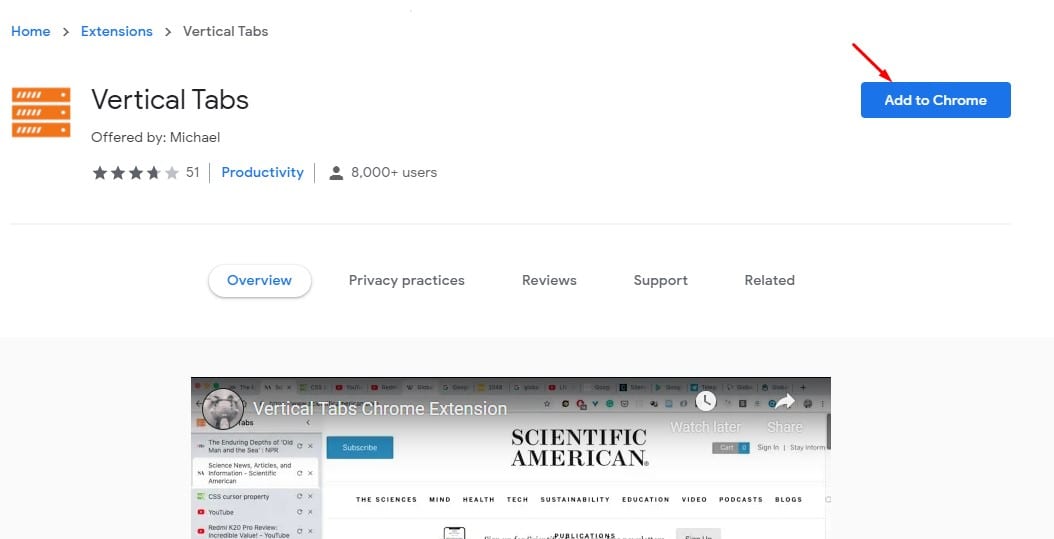
In this article, we will share a detailed guide on how to get Vertical Tabs in the Google Chrome web browser. The process will be easy; just follow some of the simple steps given below. Step 1. First of all, open Google Chrome on your desktop computer. Step 2. Now head to the Chrome web store and search for ‘Vertical Tabs.’ Or else, you can click on this link to directly open the webpage. Step 3. On the extension page, click on the ‘Add to Chrome’ button.
Step 4. On the confirmation popup, click on the ‘Add Extension’ button.
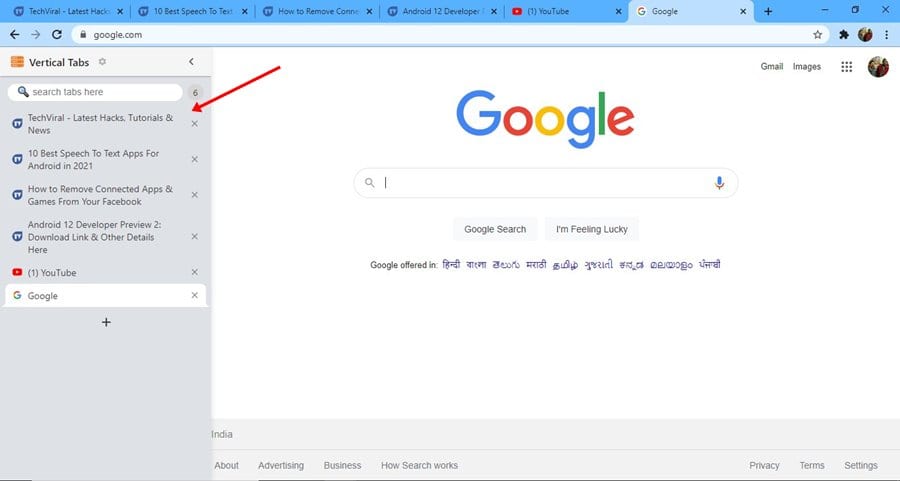
Step 5. Once enabled, restart the web browser and do regular web browsing. You will note vertical tabs on the left side.
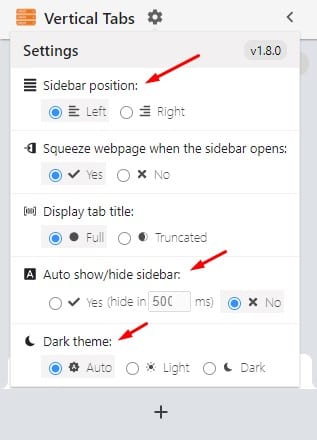
Step 6. Click on the Settings icon to set the vertical tab as per your wish.
Step 7. You can select the Sidebar position, auto-hide sidebar, enable dark mode, and more from the settings page.
That’s it! You are done. This is how you can enable the Vertical Tabs functionality on the Google Chrome browser. This article is all about how to enable Vertical tabs on the Google Chrome browser. I hope this article helped you! Please share it with your friends also. If you have any doubts about this, let us know in the comment box below.


