Users have claimed their SSD performance has become slower than ever after updating to Windows 11. After getting many user complaints, Microsoft released an update focusing on fixing slow SSD performance on Windows 11. The update had removed the bug interfering with the functionality of SSD, but the problem still resides, and users were forced to look into other ways to fix the SSD problem. Hence, you may find this guide useful if you have noticed a significant drop in your SSD performance.
Improve SSD Performance on Windows 11
Below, we have shared a few simple and easy methods to improve SSD performance on Windows 11 computers. The methods will be very easy; follow them as we have mentioned. Let’s get started.
1) Install the Windows 11 KB5007262 Update
As we noted early in the post, Microsoft released a patch to fix the SSD performance issue on Windows 11. The patch is available in the Windows 11 KB5007262 update. So, check for the available updates on your Windows 11 PC and install it. If your PC isn’t eligible to receive the KB5007262 update, you need to download & install it manually. For that, follow some of the simple steps we have shared below.
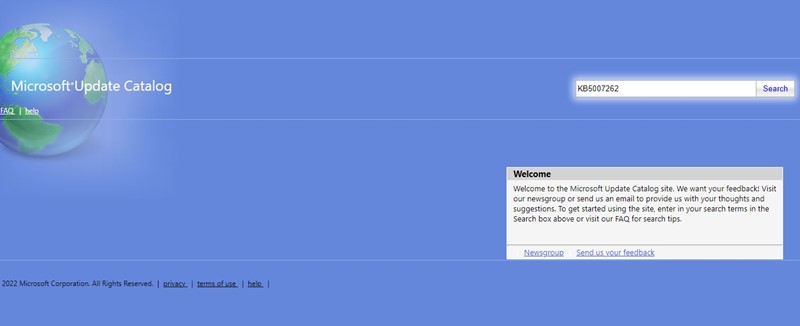
Open your favorite web browser and visit the Microsoft Update Catalog page.
On the Microsoft Update Catalog page, search for KB5007262.
Next, download the x64 version for the update file. Once downloaded, install the update on your computer. That’s it! This is how you can download and install the Windows 11 KB5007262 manually.
2) Enable the Fast Startup
The update will probably fix the slow SSD performance issue on your Windows 11 computer. However, after applying the patch, you can make a few changes to enhance your SSD performance more. Here’s how to enable the Fast Startup.
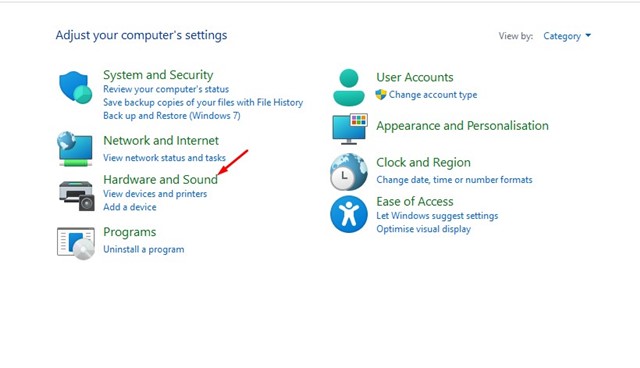
Open the Control Panel on your Windows 11 and click on Hardware and Sound.
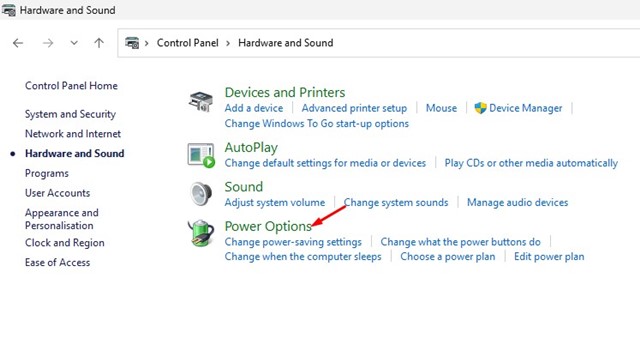
On the Hardware and Sound page, click on Power Options.
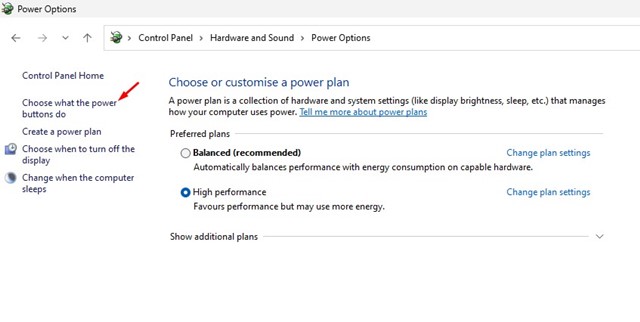
On the Power Options, click the Choose what the power button does.
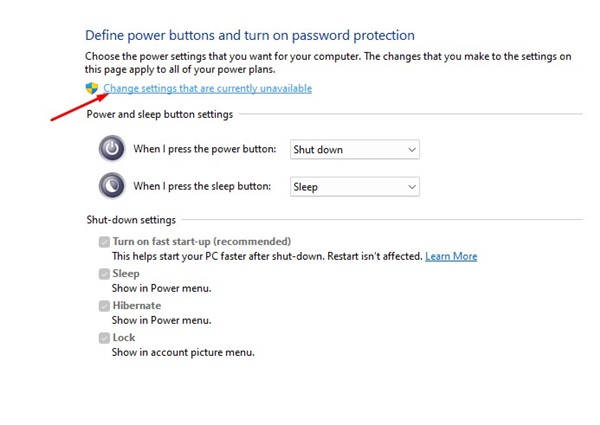
On the next screen, click on the Change settings that are currently unavailable.
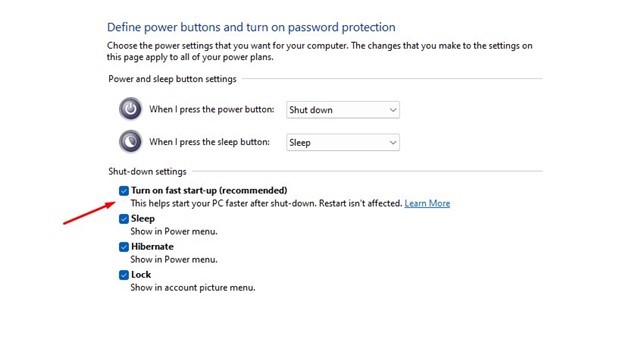
Now, under the Shutdown settings, check the ‘Turn on fast startup‘. Once done, click on the Save Changes button.
That’s it! This will enable the Fast Startup on your Windows 11 device.
3) Disable Startup Programs on Windows 11
Unnecessary startup programs can slow down the boot time of your Windows 11. Even if you have an SSD, you will notice a drop in performance if you have many Startup Programs enabled. Here’s how to disable Startup Programs to improve SSD performance on Windows 11.
First, click on the Windows 11 search and type Task Manager. Next, open the Task Manager app from the list of matching results.
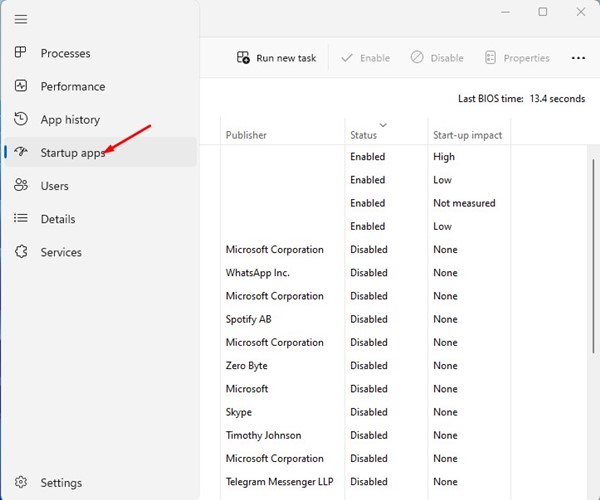
On the Task Manager, switch to the Startup apps tab, as shown in the screenshot below.
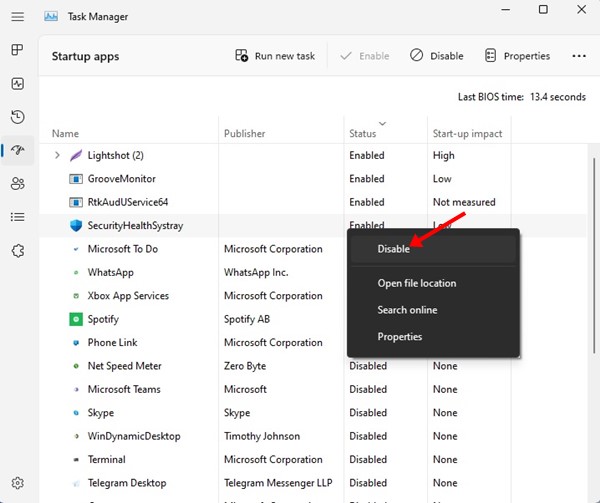
Now click on the Status section to sort enabled apps. Now, right-click on all unnecessary apps and select ‘Disable’
That’s it! You must repeat the steps for every Startup app you want to disable.
4) Disable the SSD Defragmentation
The Disk Defragmentation tool of Windows allows you to free up storage space and speed up an aging drive. The tool fills empty gaps and brings the stored data closer for faster access. However, you don’t need to run the defragmentation on SSD as it will shorten the lifespan. Many users have reported speeding up SSD just by disabling SSD defragmentation. Here’s what you need to do.
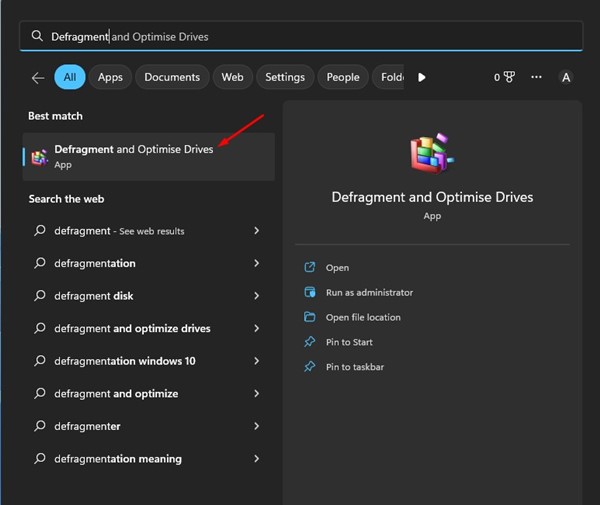
First, click on the Windows 11 search and type Defragment. Next, launch the Defragment and optimize drives tool from the list of matching results.
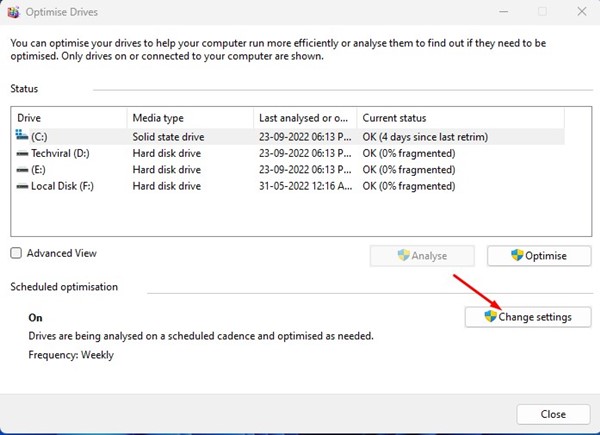
Click on the Change settings button under the Scheduled optimization.
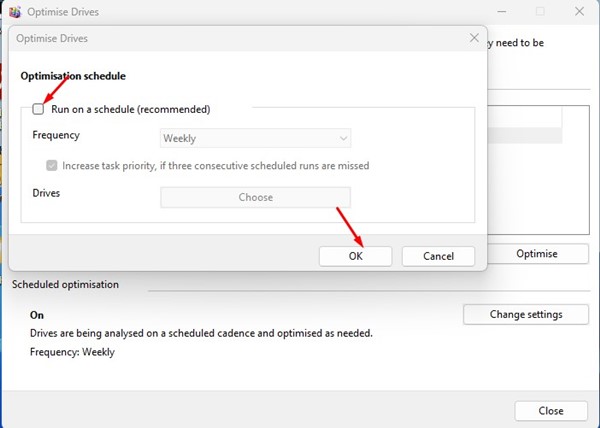
On the Optimize Drives prompt, uncheck the ‘Run on a schedule‘ option. Once done, click on the Ok button.
That’s it! This is how you can speed up SSD On your Windows 11 by disabling the SSD defragmentation. Also read: Windows 11 Free Download So, these are some of the best ways to speed up SSD on your Windows 11 computer. Let us know in the comment box below if you know of any other ways to speed up a slow SSD on Windows 11.
